How it works: from design to install without retyping
- Modules
- 5
- From
- $12 USD/mo
- Trial
- 14 days, no card
- Units
- mm, cm and inches
The life of a project
- 01
Design the cabinets
Lay out the kitchen, closet or vanity with base, wall and tall cabinets, drawer banks and more. Review it in 3D, plan and elevation views with your client.
- Hands off to the next step
- Cut list with sizes, material and edge banding per side; hardware list.
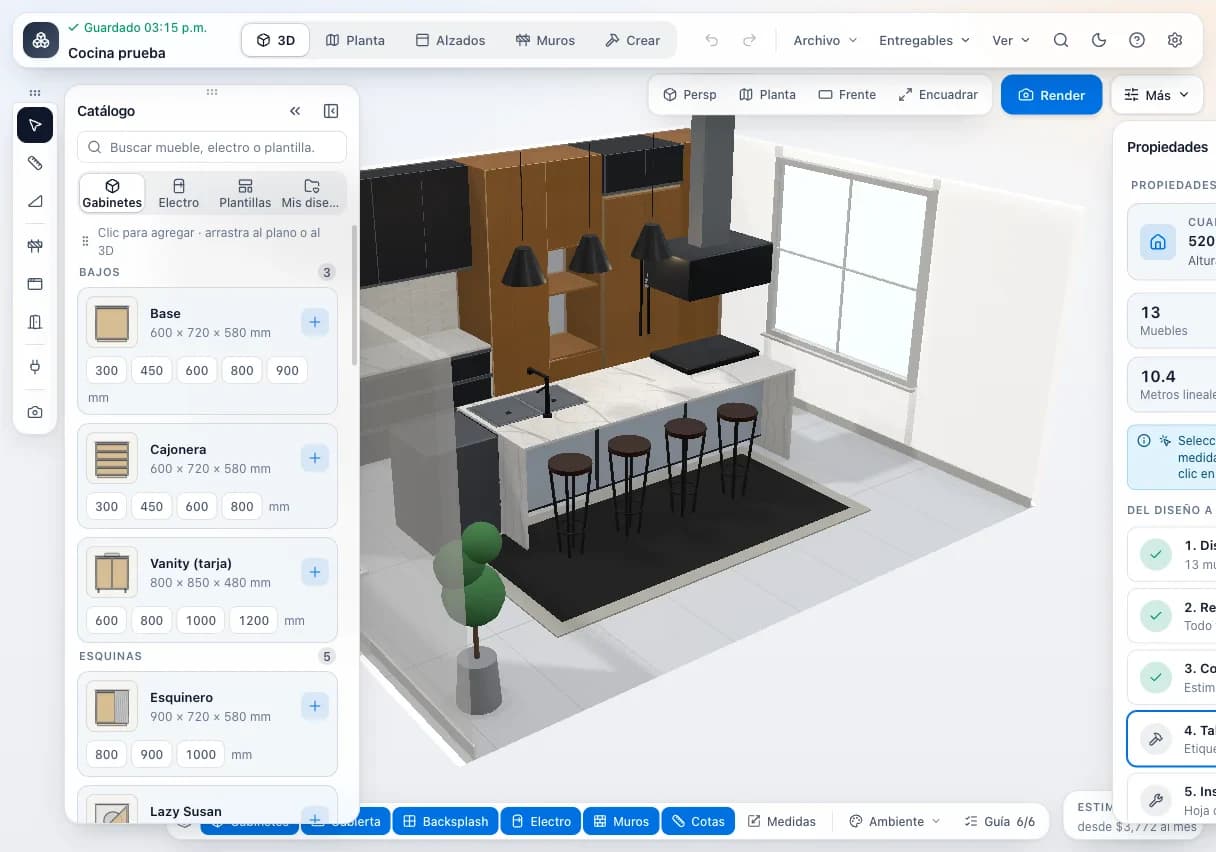
Fig. 1 — The example kitchen in the 3D design view. - 02
Optimize the cutting
The cut list reaches the optimizer. Pick guillotine or nesting and a goal (fewest sheets, fewest cuts, least waste…), and the optimizer uses your offcuts first.
- Hands off to the next step
- Sheets per material, edge banding length, QR labels, PDF and CNC files.
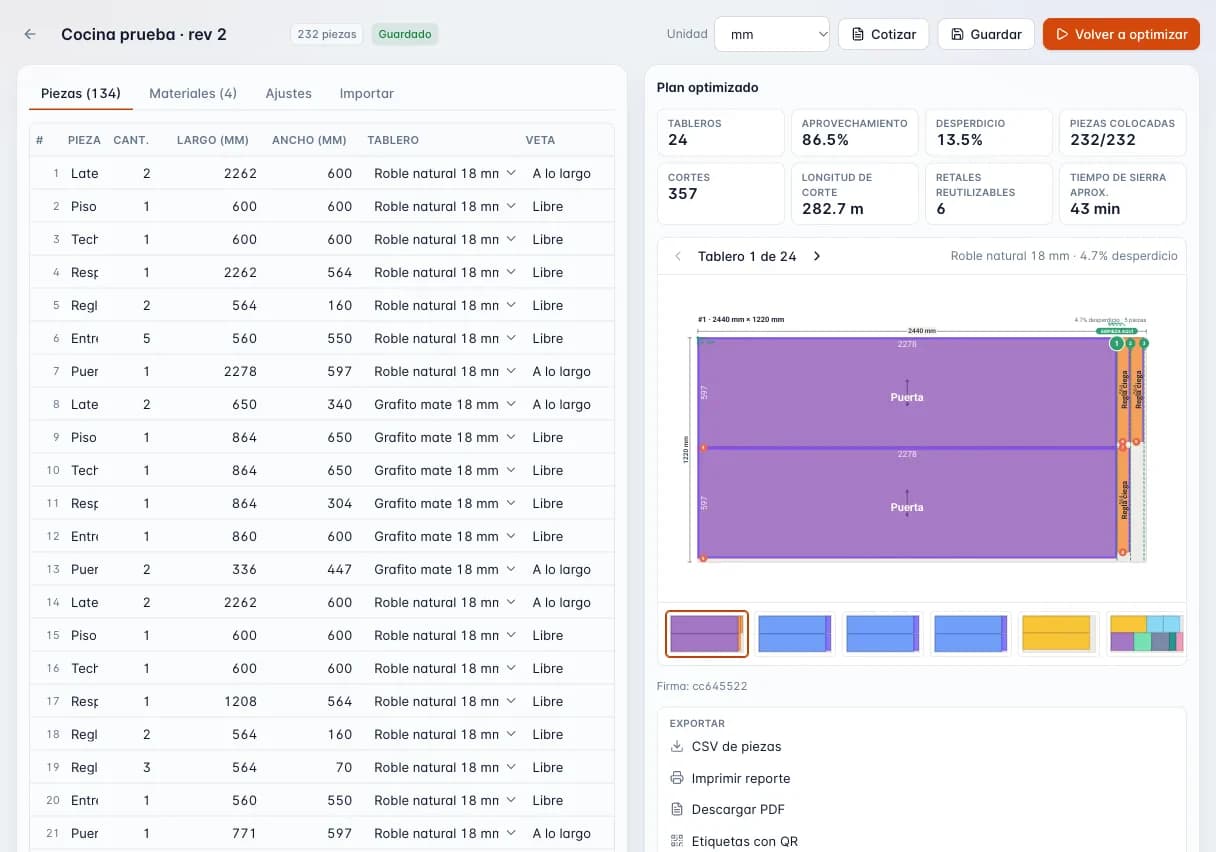
Fig. 2 — Optimized plan for the example kitchen: 232 parts on 24 sheets. - 03
Quote from real costs
The quote fills in with material, edge banding and hardware from the design or cut job. Add labor, install and delivery, choose markup or margin, tax and deposit.
- Hands off to the next step
- A quote the client accepts from their link.
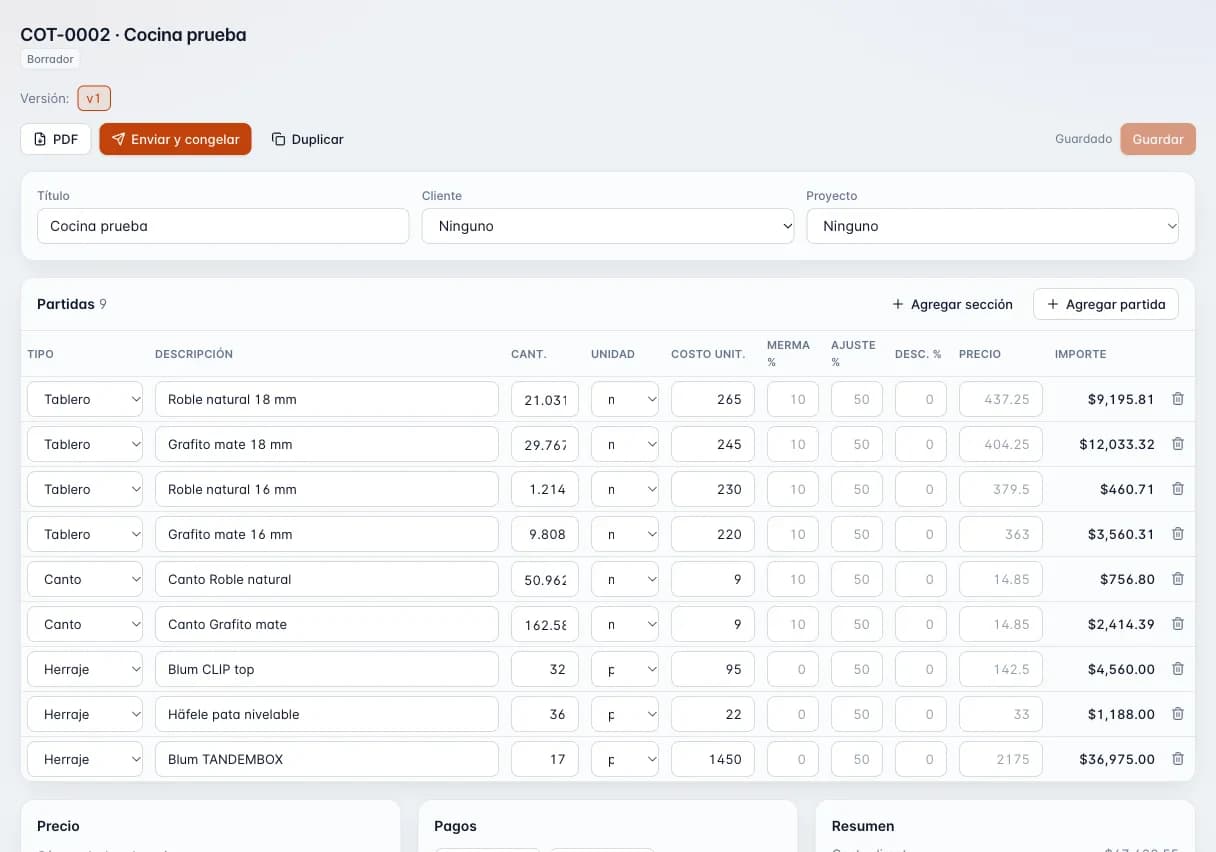
Fig. 3 — Quote for the example kitchen. Costs are example values. - 04
Send it to production
An accepted quote becomes a job that moves through your stages: cutting, banding, CNC, assembly, finishing, QC and install. The shop floor moves it from a touch view.
- Hands off to the next step
- A job with its stage, due date and notes.
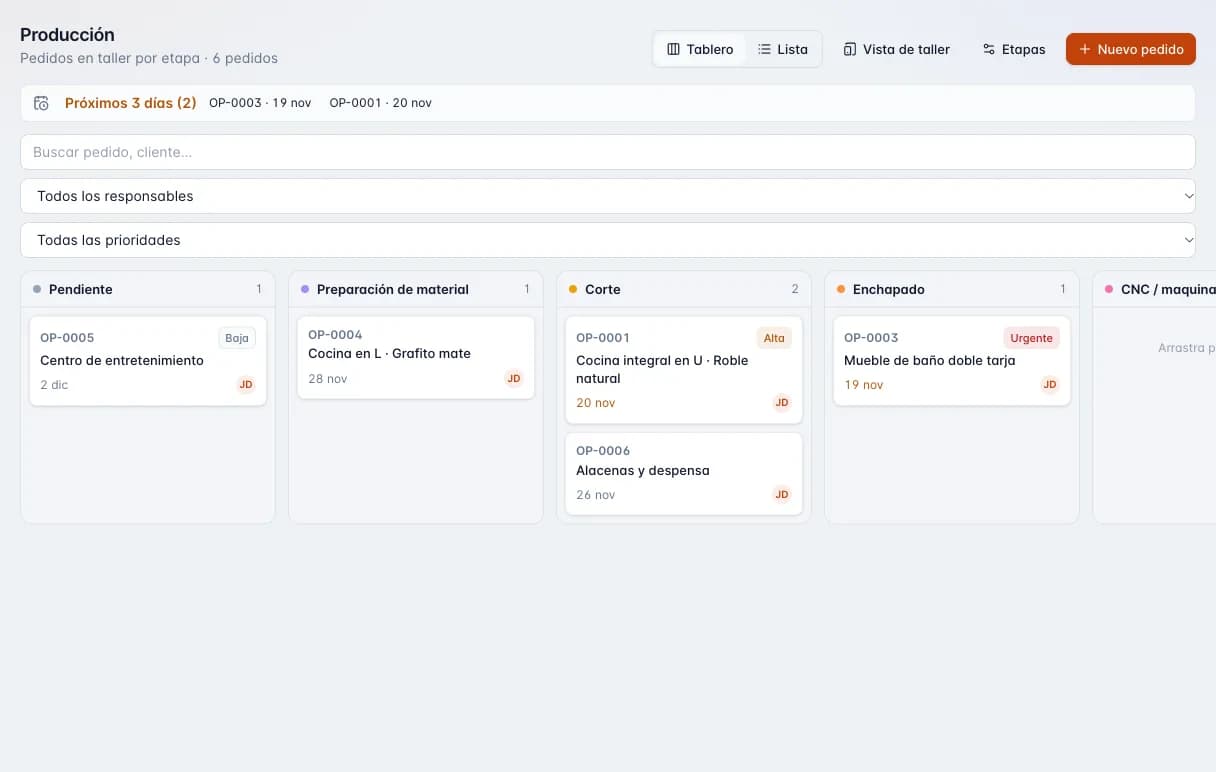
Fig. 4 — Production board with six example orders. - 05
Keep stock straight
The job's material is reserved in inventory and deducted automatically when the job reaches a done stage. You see what's free before you buy.
- Hands off to the next step
- Up-to-date stock for the next project.
Three ways to start
You don't have to adopt everything at once.
Try the optimizer today
No account, up to 50 parts per job, right in your browser.
Open the free optimizerTry the full flow for 14 days
The Workshop plan (Design + Cut + Quote) with no card. Afterwards you drop to Free.
Create free accountBuy a single module
If you only need cutting or quoting, pay for just that and add modules later.
See pricingWhat if I only use one module?
- Cut works alone: type, paste or import the cut list by CSV.
- Quote works alone: enter line items by hand with prices from your catalog.
- Production works alone: create jobs without a quote.
- When you add modules, your existing projects and customers connect.
Frequently asked questions
Do I have to use every module?
No. Each module works on its own. Combining them means data flows between them without retyping.
What if the client asks for a change?
Change the design and send the cut list to Cut and Quote again. A sent quote is frozen as a version; you can create a new version.
Can I import a cut list I already have?
Yes. In Cut you can paste text or upload a CSV, TSV or TXT file with English or Spanish headers, decimal commas and fractions.
Can the client accept the quote online?
Yes. Every quote has a link you share yourself; the client views it and accepts or rejects it there.
Does it work with my CNC?
Cut exports DXF, G-code, MPR (Homag) and CIX (Biesse). Check which format your machine uses.
Cut better starting with your next job
Create an account and use the full Workshop plan for 14 days. No card; afterwards you drop to the Free plan, not a lockout.